Create a form
Before we can add a workflow, we need to create a form first. Follow the steps below to create the form. After you have created the form, you can follow one of the payment provider docs to start accepting payments.
Prepare the form
- Go to Umbraco Forms
- Select "Create"
- Select "Empty form"
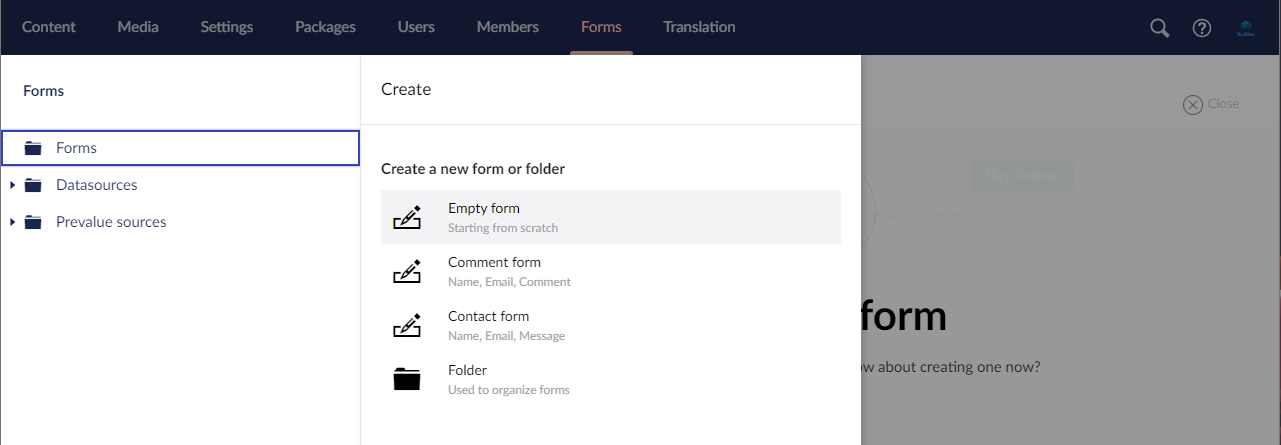
- Fill in a name for the form e.g. "Donation Form"
- Remove the dataConsent question
Add transaction ID field
Optionally you can add a transaction ID field, to save the transaction ID of the payment in a forms entry.
- Select "Add question"
- Enter "Transaction ID" or something else of your liking for the name of the field.
- Set the alias to transactionId. (This step is required, if the alias is named something else, the transaction ID will not be saved)
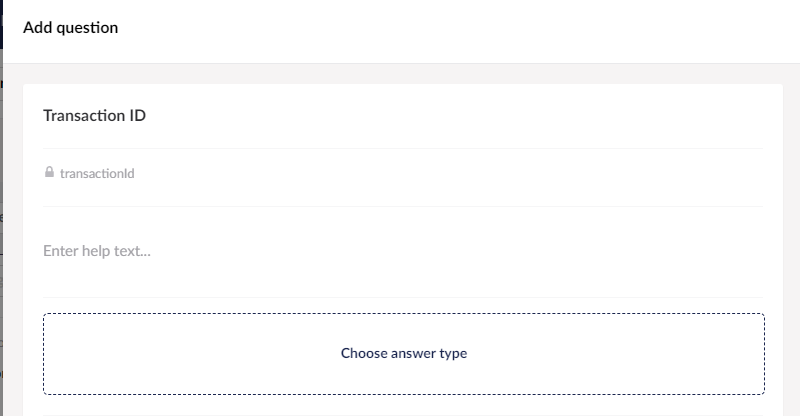
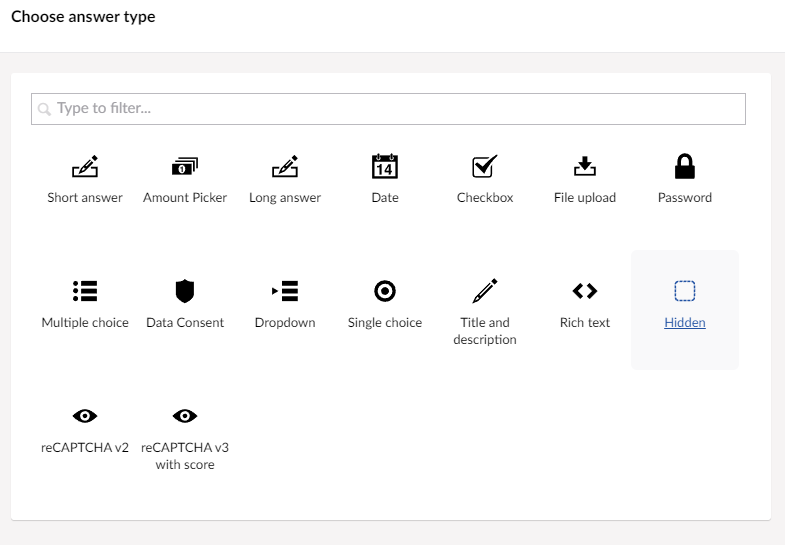
- Choose "Hidden" as the answer type
- Click on submit
Add payment status field
Optionally you can add a payment status field, to save the status of the payment in a forms entry.
- Select "Add question"
- Enter "Payment Status" or something else of your liking for the name of the field.
- Set the alias to paymentStatus. (This step is required, if the alias is named something else, the payment status will not be saved)
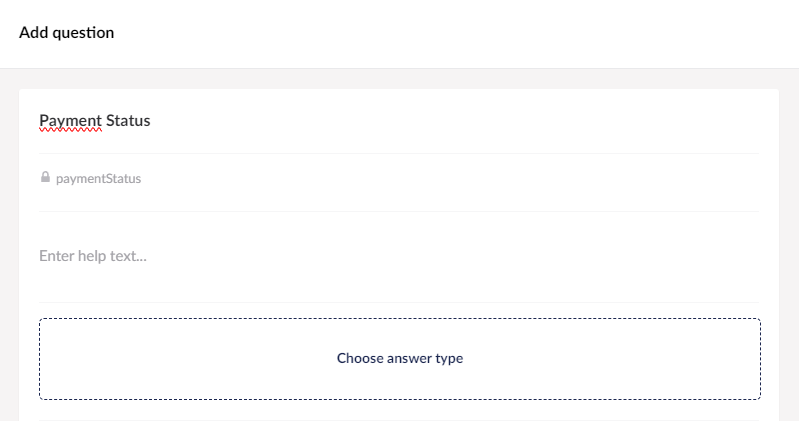
- Choose "Hidden" as the answer type
- Click on submit
Add amount picker field
You can let the user choose or fill in an amount on the form, this is especially usefull in cases like donation forms.
If you want to set a fixed price for the form, you can skip this step and use the amount field on the workflow settings.
The amount picker currently only works with Adyen and Mollie. We are working on support for Stripe for a future release.
- Select "Add question"
- Enter "Donation Amount" or something else of your liking for the name of the field.
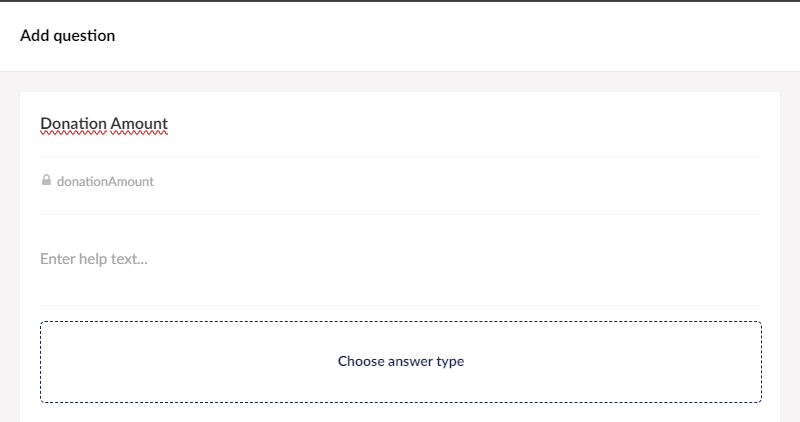
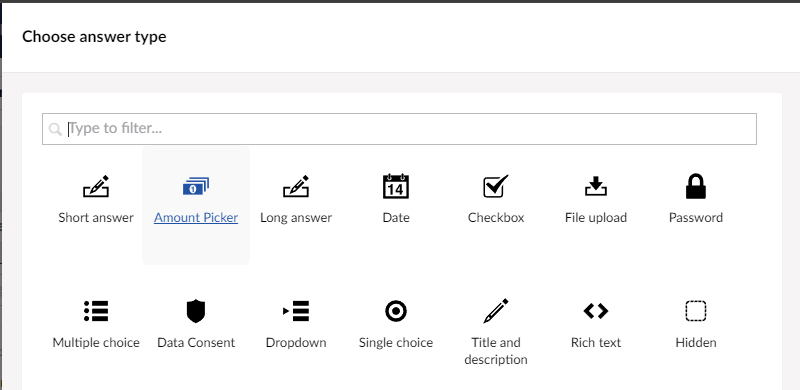
- Choose "Amount Picker" as the answer type
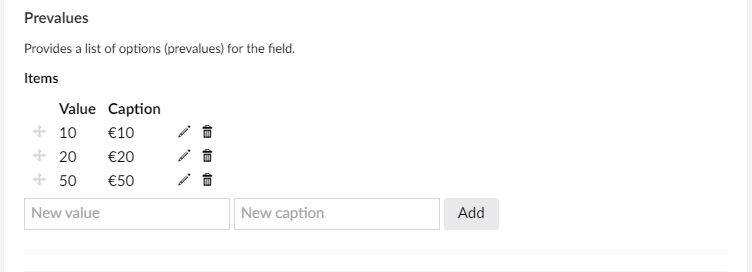
- Add predefined amounts, using the prevalues field
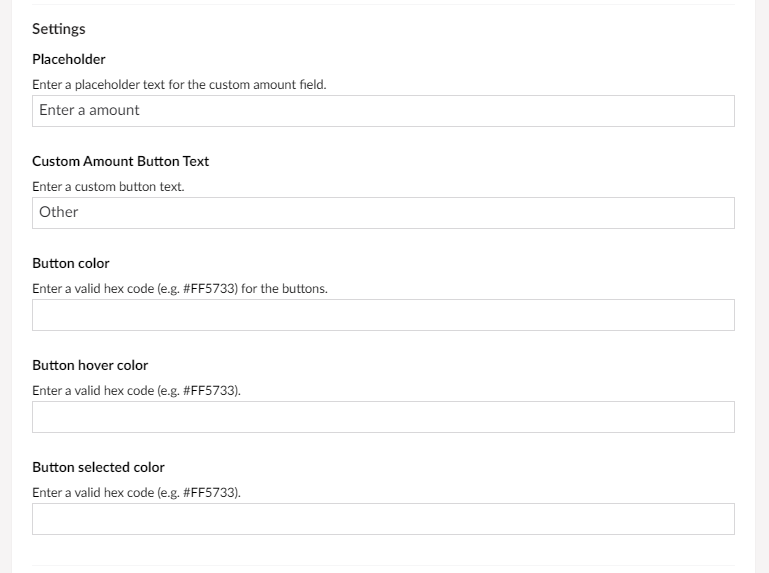
- Optionally fill the other fields under settings
- Click on submit
Next step
In the next step you will setup a payment workflow to trigger after the user submits the form.
Setup a payment workflow using Stripe
Setup a payment workflow using Mollie